How to Create a New Case for Origination
Follow this step-by-step guide to create a new pre-close loan case within the Advocate platform.
Video Walkthrough:
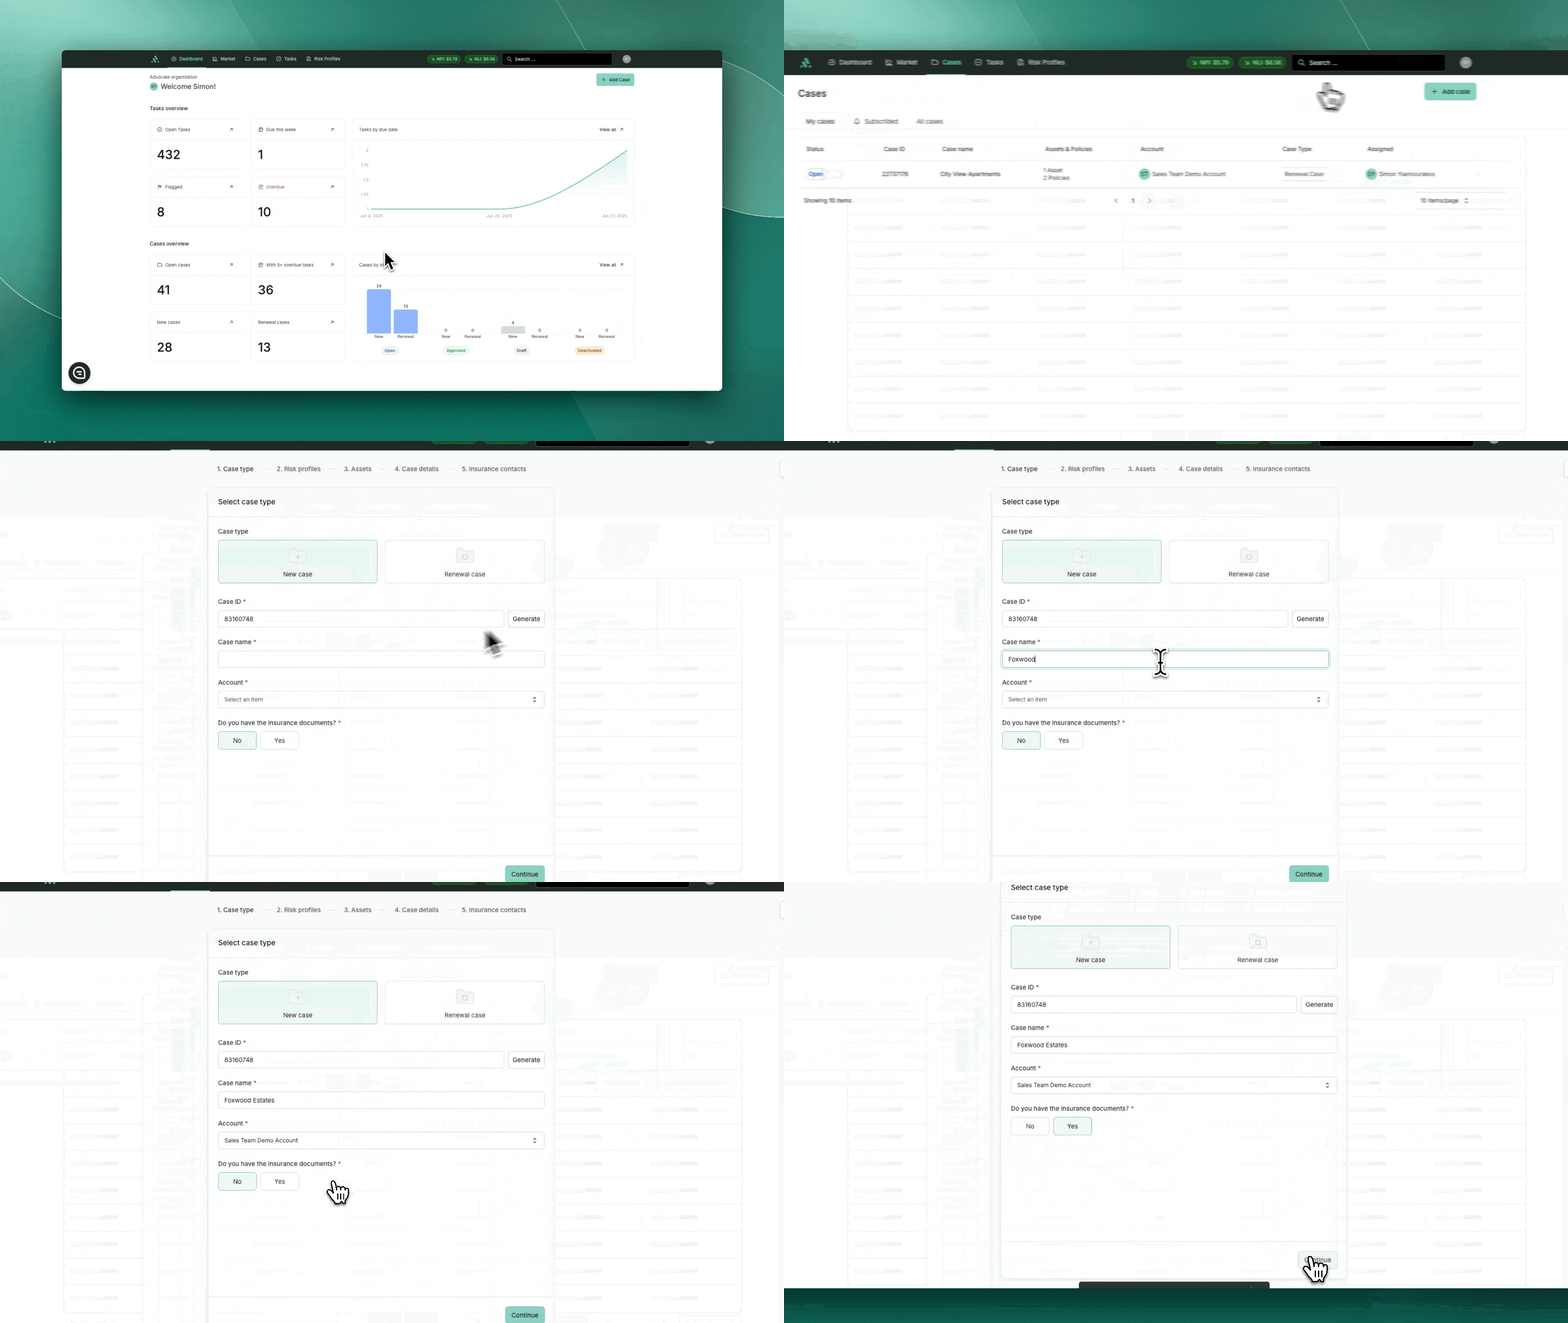
Step 1: Access the Cases Tab
Log into the Advocate platform.
From the top navigation menu, click on the “Cases” tab.
Step 2: Add a New Loan Case
On the Cases page, click “+ Add Case” in the top-right corner.
Step 3: Select Case Type
In the Case Type dropdown, choose “New Case.”
Fill in the required fields:
Case ID – A unique identifier for the loan.
Case Name – A descriptive title for the loan case.
Select "Yes" or "No" for "Do you have insurance documents?"
Note: This will determine whether relevant tasks to reach out to the Insurance Contact will be initiated, or the user will be able to proceed with an insurance review at submission.
Click “Continue” to proceed.
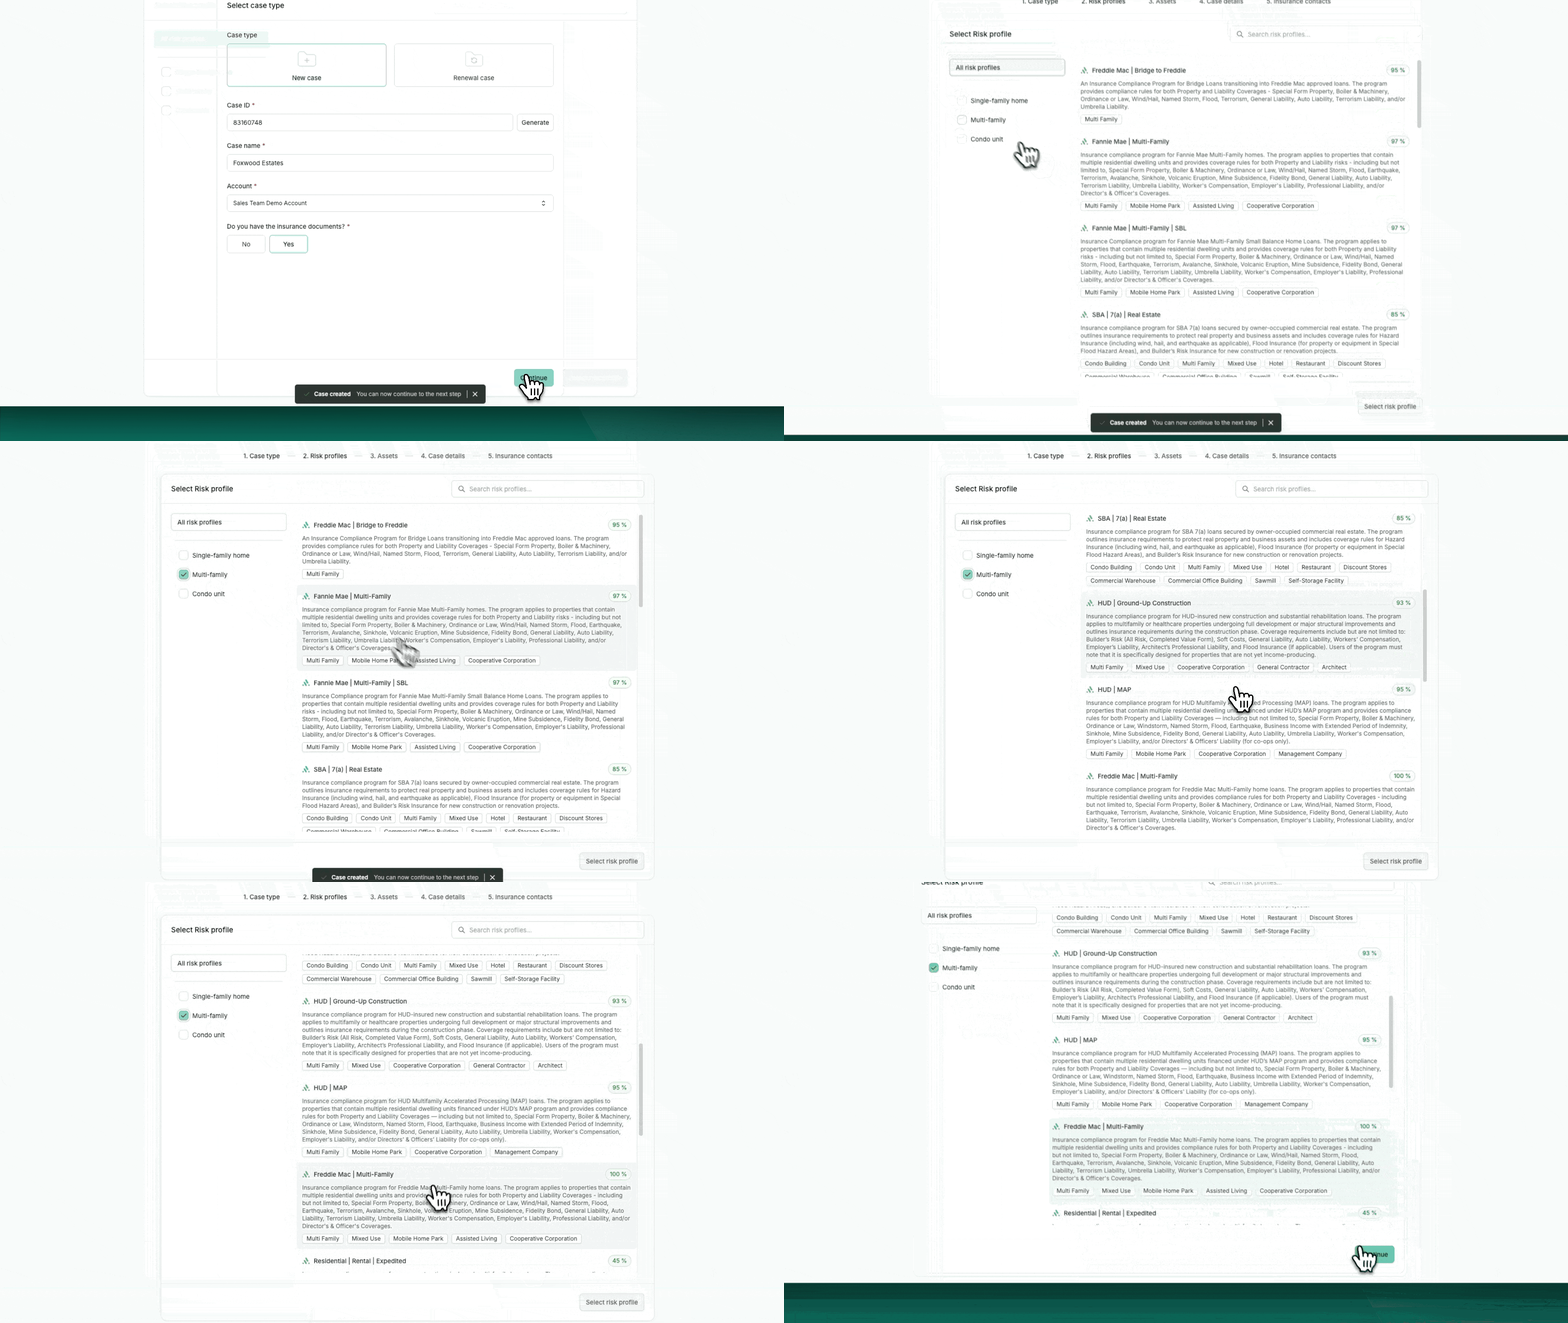
Step 4: Select Risk Profile
On the left panel, select the insured asset type to filter appropriate risk profiles.
Choose the most relevant Risk Profile for the asset.
Step 5: Add Asset(s) and Upload Document(s)
Add Asset
Click “+ New Asset.”
Complete:
Asset Type – Choose from options (e.g., Multi-Family, Assisted Living).
Address – Begin typing to auto-fill or manually enter.
Required collateral fields must be filled. Incomplete fields will highlight in red.
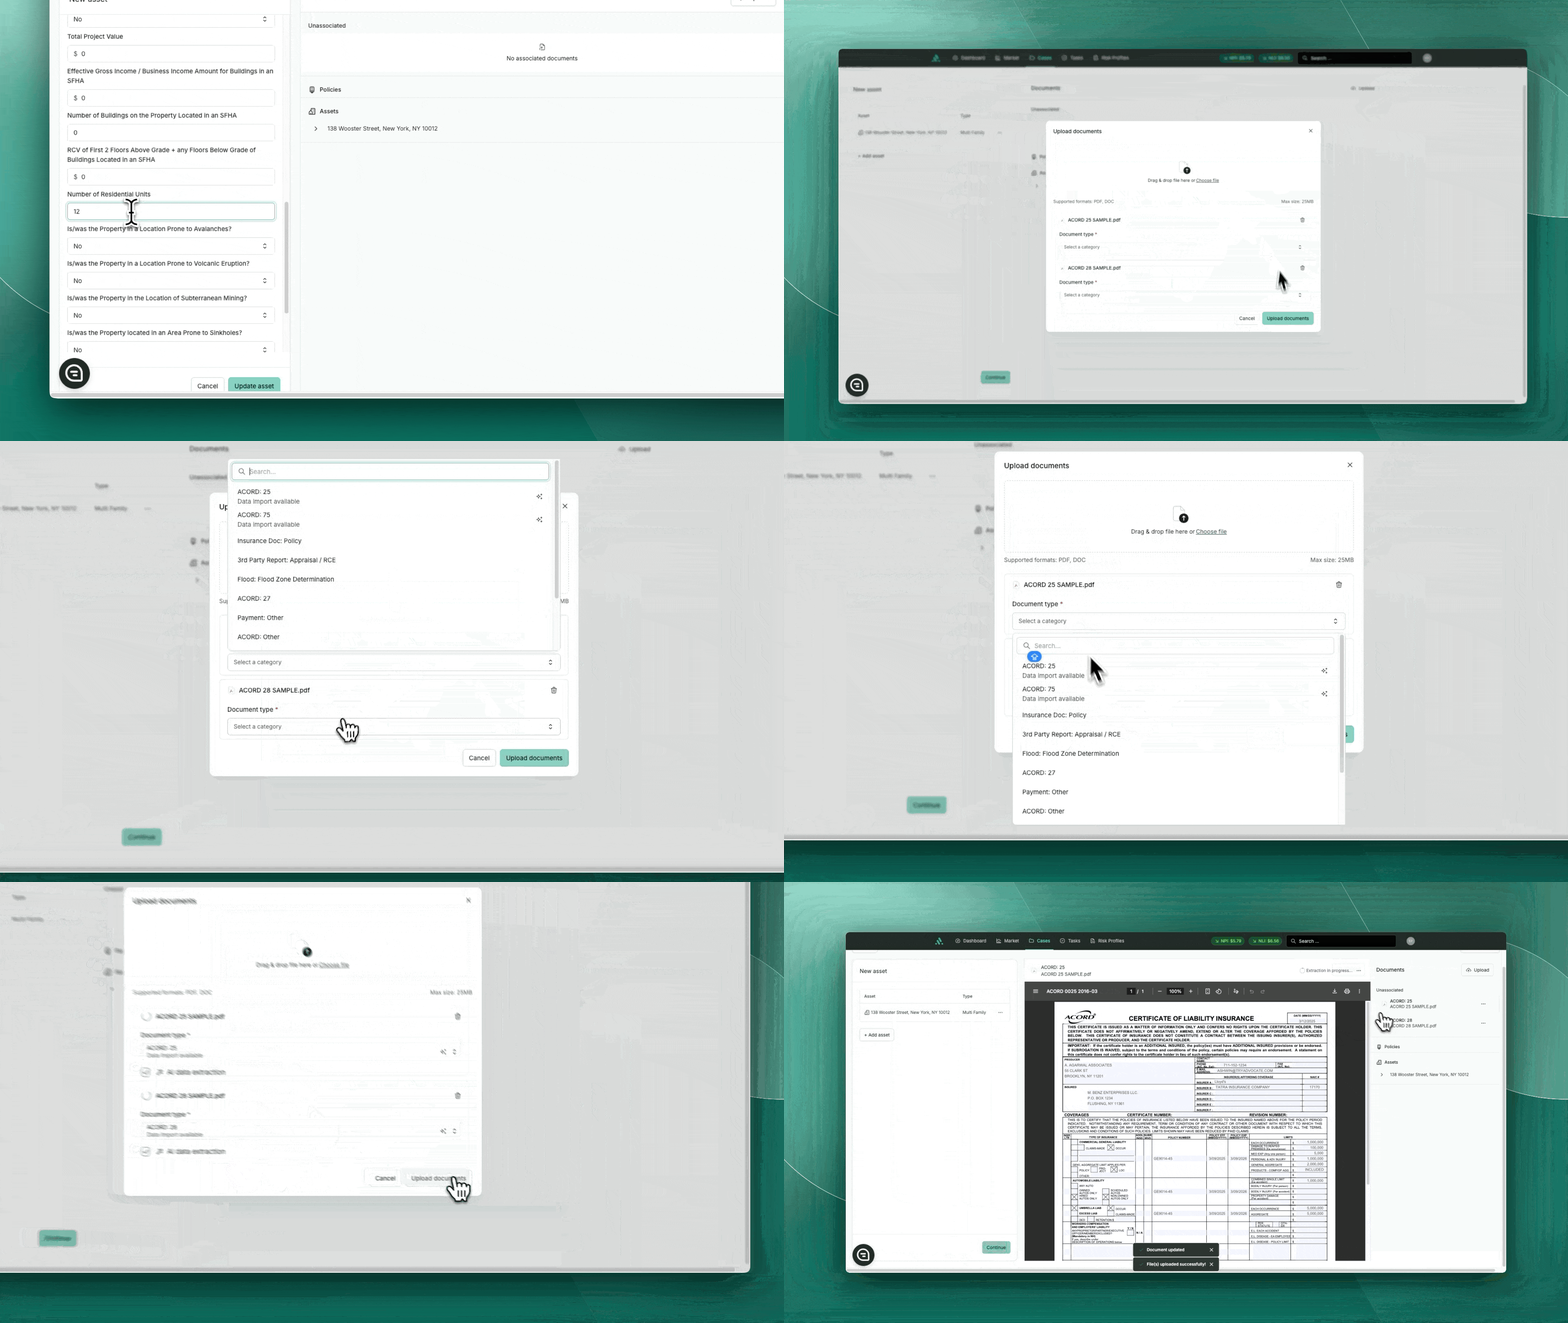
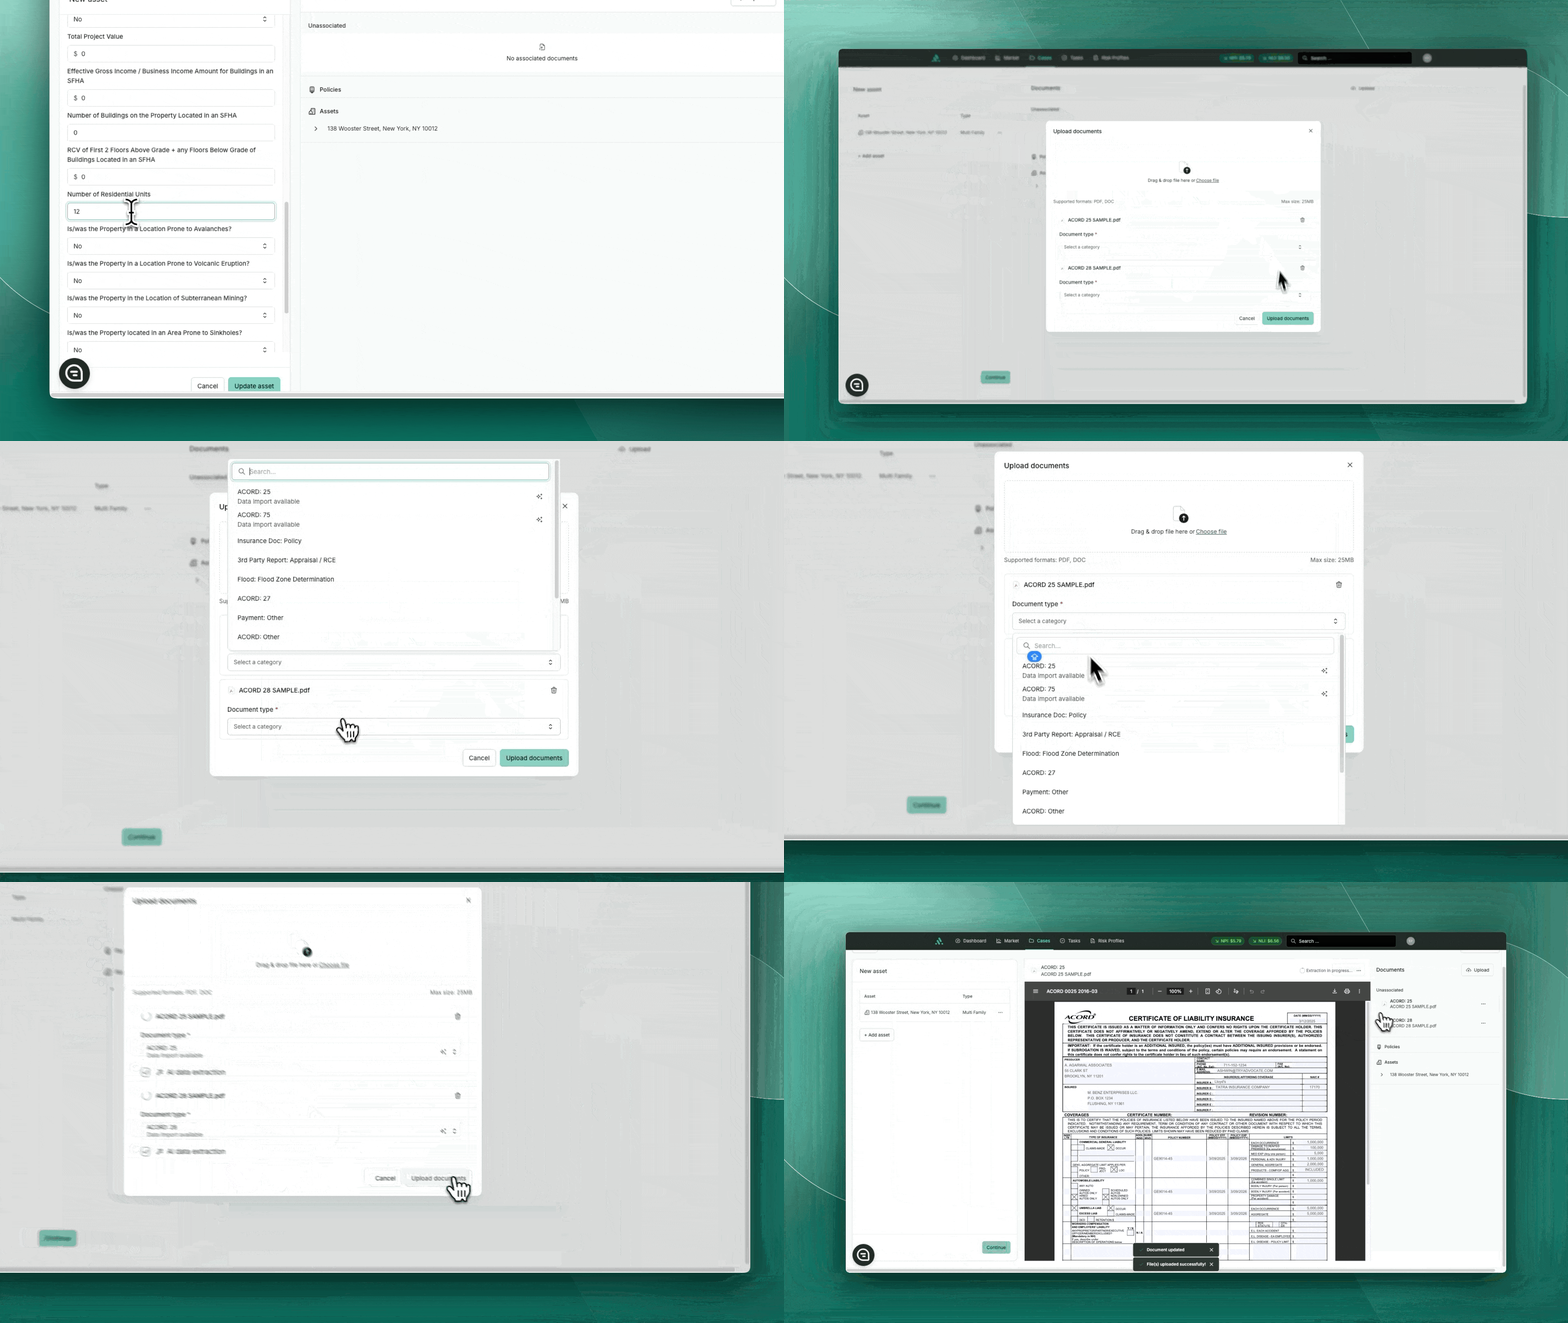
Upload Documents
Click “Upload Documents.”
Add all necessary insurance documentation (e.g., ACORD forms, certificates).
Click “Continue.”
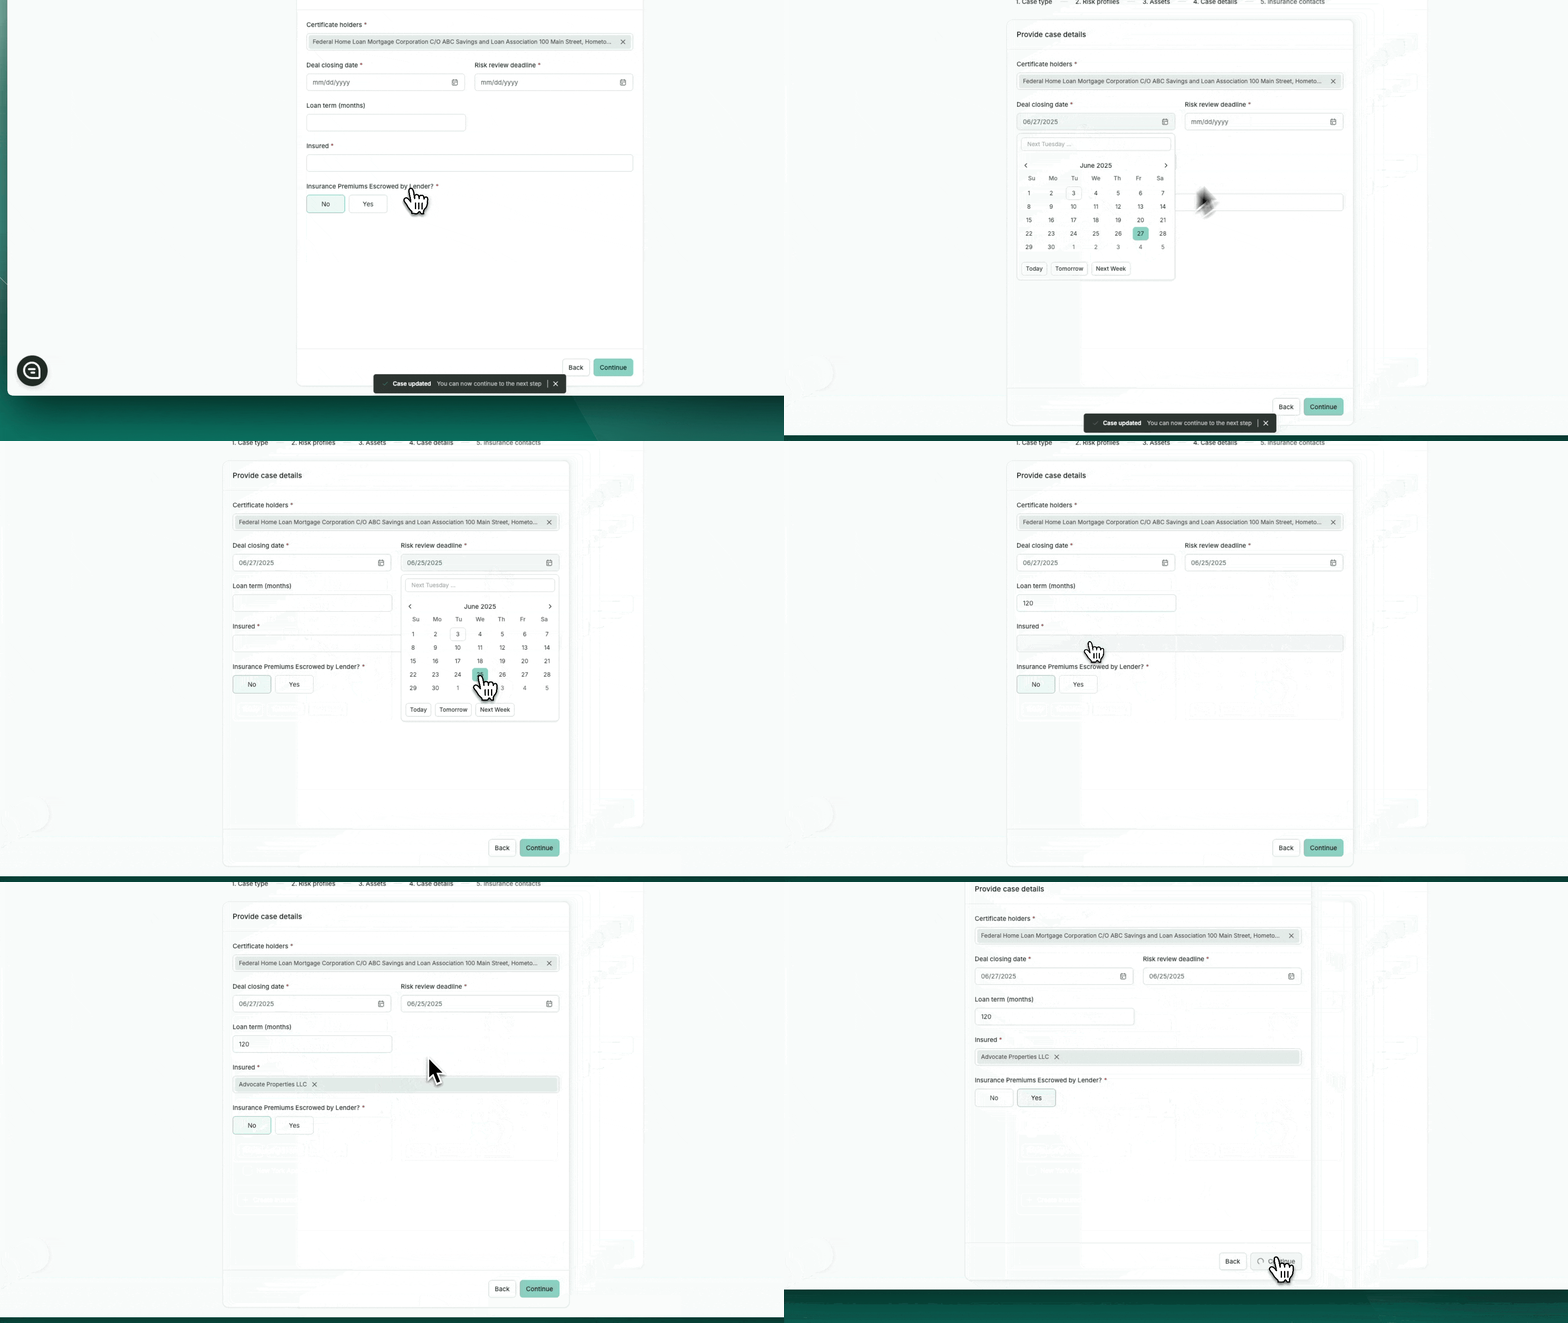
Step 6: Enter Case Details
Provide key loan and borrower information:
Certification Holders
Deal Closing Date
Risk Review Deadline
Loan Term
Insured – Select from the dropdown.
If not listed, click "+ Create Insured"
Insured Type: Corporate
Company Name Name: Enter LLC/SPE name
(Optional) Borrower Group: Add sponsor entity
Insurance Premiums Escrowed by Lender?: Yes or No.
Click “Continue.”
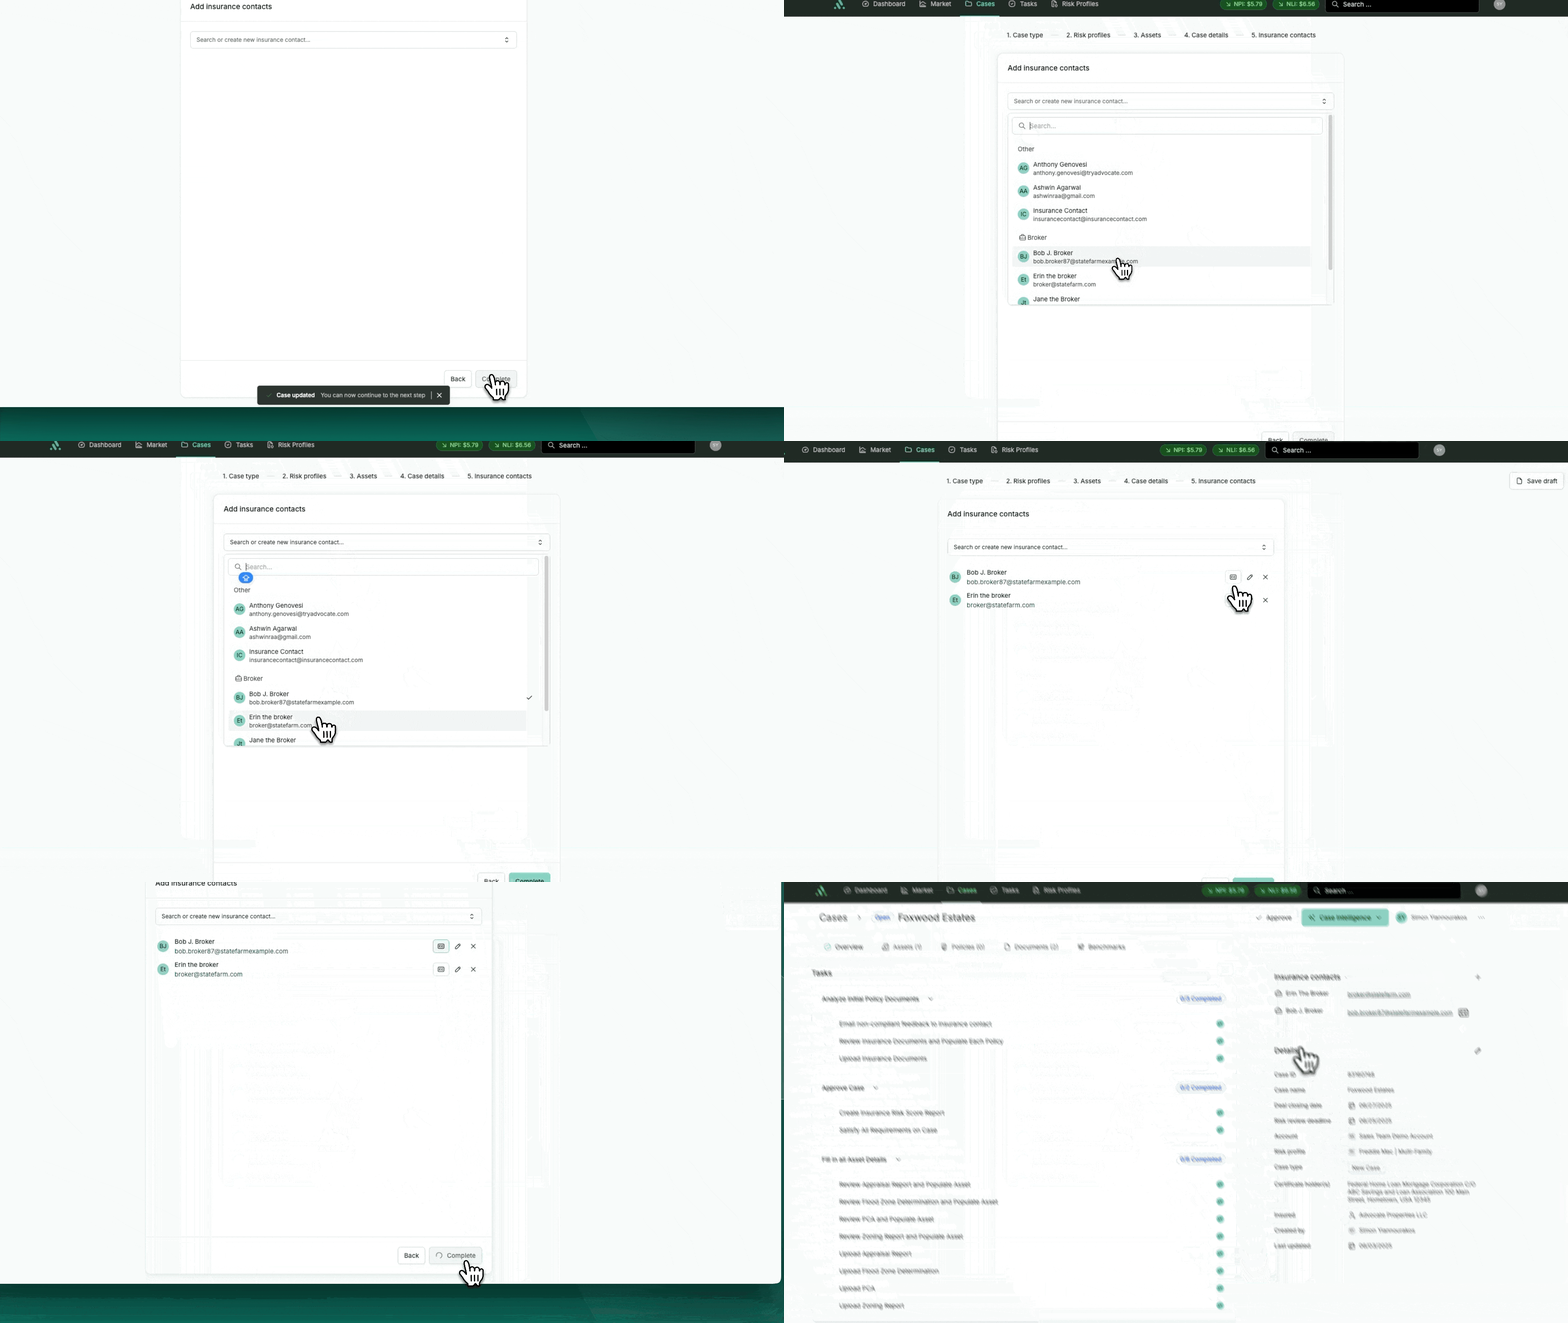
Step 7: Add Insurance Contacts
Add at least one Primary Insurance Contact.
Choose an existing contact or click “Create New.”
Provide:
Contact Type: Borrower, Broker, or Other
Name
Email
Click “Create.”
Step 8: Submit the Case
Confirm all fields are complete and documents are uploaded.
Click “Complete” to submit.
Case Overview Page
After submission, you'll land on the Case Overview Page. From here, you can view case details and proceed to create a policy.
Creating a Policy
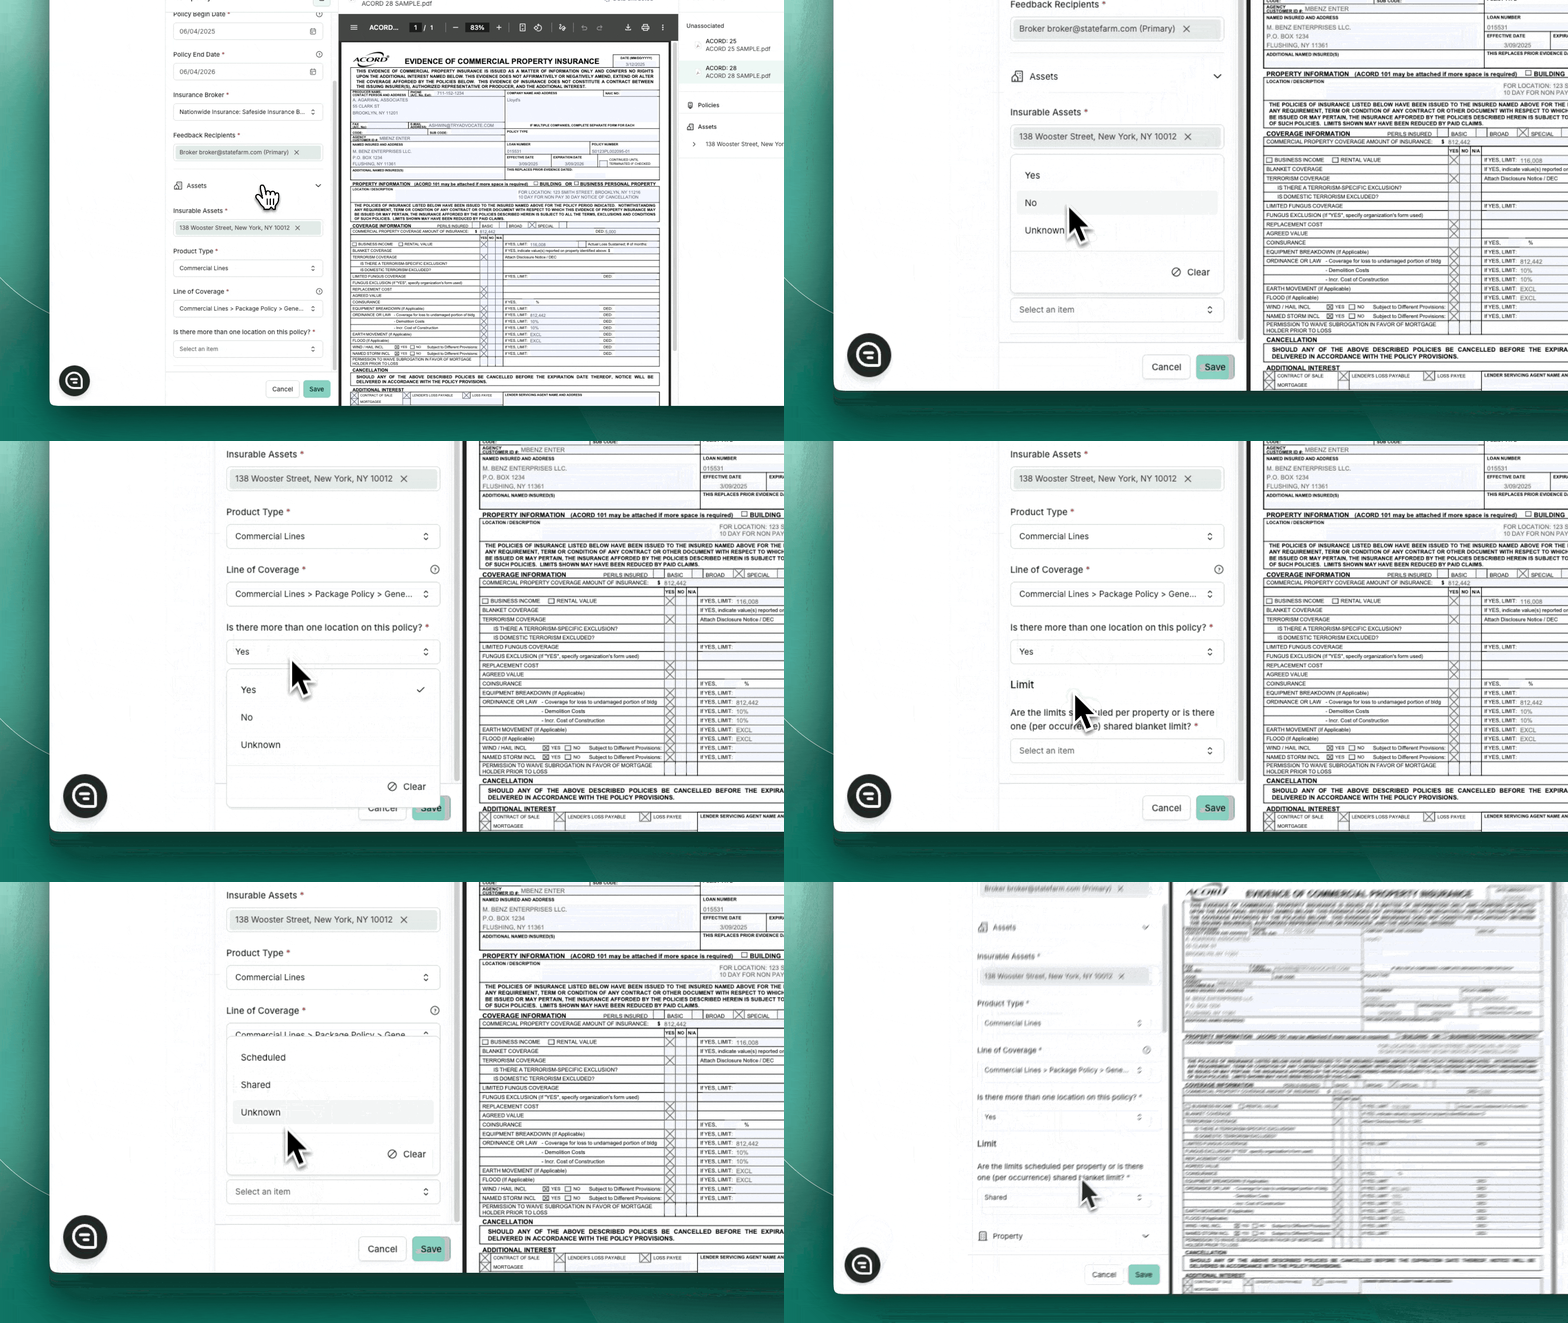
Step 1: Complete Full Policy Fields
Policy Information
Policy Number, Begin/End Dates
Insurance Broker – Select or create
Feedback Recipients – Insurance Contacts
Coverage Details
Insurable Asset
Product Type – Typically Commercial Lines
Line of Coverage – e.g., Commercial Package
Step 2: Define Asset Coverage Structure
Is there more than one location?
Yes → Scheduled or Blanket
No → Standalone
Determine Blanket Structure
Shared Limit?
Yes → True Blanket
No → Check for Overall Shared Limit
Yes → Scheduled Blanket
No → True Scheduled
Note: Multiple asset selection defaults to “Yes.”
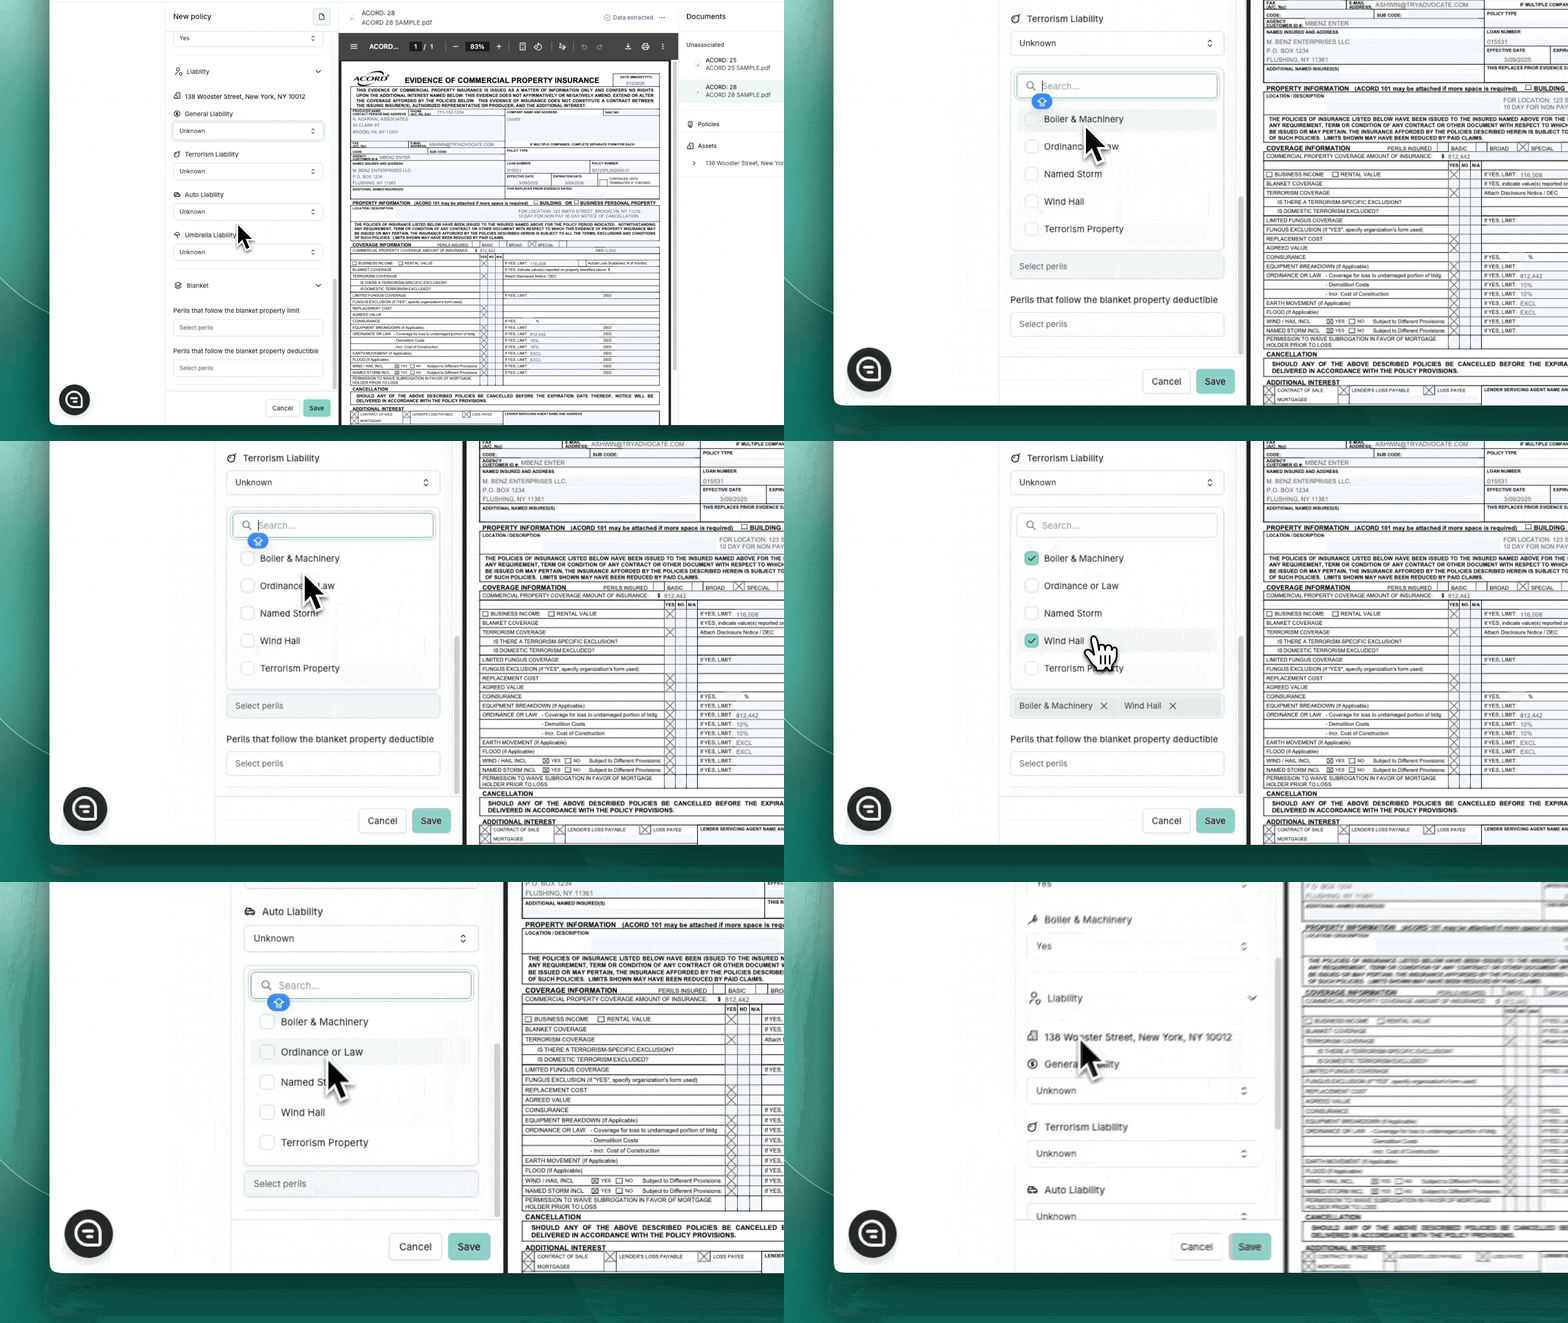
Step 3: Select Perils & Sub-limits
Perils
Based on Line of Coverage, relevant perils auto-activate via ARA.
Sub-Limits
For each peril (e.g., Boiler & Machinery, Terrorism):
Does limit follow Property limit?
Yes → Auto-filled
No → Enter manually
Does deductible follow Property deductible?
Yes → Auto-filled
No → Enter manually
Step 4: Blanket Peril Settings (If applicable)
If policy includes Shared/Overall Blanket limits:
Perils following Blanket Limit: Auto-fills peril limit
Perils following Blanket Deductible: Auto-fills deductible
Tip: You can select multiple perils for both.
Step 5: Finalize Policy
After completing all fields:
Click “Create Policy.”
The policy will now appear on the Case Overview.

